Low water pressure is a common and frustrating plumbing problem, especially in the kitchen, where the sink is used all day long. However, some causes of low water pressure can be easily identified and fixed on by yourself without hiring a plumber. Read on for a step-by-step overview of troubleshooting low water pressure in your kitchen faucet.
Step 1: Isolate the Problem
If you notice that the water coming out of your kitchen faucet has lower pressure than it should, the first thing you should do is check other faucets in your home. Check to see if the water coming out of the bathroom sinks, showers, and other faucets also have lower pressure.
- If some or all of your faucets have this problem, ask your neighbors if they are experiencing the same issue. If this is happening in multiple homes, then there may be an issue with the municipal water supply. Contact your water provider to report the issue.
- If your neighbors don’t report an issue with their water pressure, then there is a problem with the plumbing in your home, such as a leaking pipe, which will be discussed later.
- If it’s just your kitchen sink that has low water pressure, the problem should be local and easy to solve.
Step 2: Determine If the Low Water Pressure is Only Isolated to Hot Water
If the low water issue is only happening to the kitchen faucet, the problem is with the fixture rather than the pipes or water line. Low pressure in only the hot water suggests sediment build-up in the heater. To solve this issue, contact your plumber to flush out your hot water heater. A water heater should be serviced every six months so that this issue doesn’t recur.
Next, you will want to check the water pressure regulator valve (PRV). It is a brass fitting near the main shut-off valve where the water line enters your house. A PRV reduces high water pressure and helps make sure your water pressure remains even. However, it can sometimes clog or malfunction. Turning the locking nut can increase or decrease pressure. However, be careful. If you increase the pressure too much, you can burst a pipe. It’s best to contact a plumber if you’re unsure.
Step 3: Clean the Aerator
The aerator is a screen that covers the end of the faucet spout. It controls the water’s flow rate and conserves water by adding air to the water stream. It also works as a filter and catches any larger minerals that are in the water. Over time, the aerator can become clogged with mineral deposits, especially if you have hard water.
To Clean the Aerator:
- Unscrew the aerator. You can use pliers to get a better grip on the aerator if necessary.
- Remove the screen and scrub it with an old toothbrush.
- Soak the aerator in diluted vinegar (vinegar mixed with water) to help dissolve harder minerals.
- Scrub the filter once again before reinstalling.
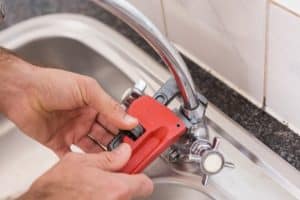
Step 3: Check the Cartridge for Clogs
If cleaning the aerator didn’t fix the problem, check the cartridge faucet. The cartridge is attached just below the faucet’s handle. It controls the opening valves which allow water to flow through the faucet. As with the aerator, mineral deposits can build up here and block the water flow. Sometimes, debris can get stuck in the cartridge if it was installed incorrectly.
To Clean the Cartridge:
- Turn off the water supply to your kitchen faucet. Our team recommends that you let all the water run out before dismantling the faucet. Plug the sink’s drain to prevent anything from falling in as you work.
- Remove the faucet’s handle.
- Use pliers or a screwdriver to remove the cartridge cover, and then pull the cartridge from the opening.
- Clean the cartridge with an old toothbrush as you did the aerator. The cartridge can also be soaked in diluted vinegar. If this doesn’t remove the mineral build-up, you’ll have to buy a new cartridge.
- Replace the O-ring seal if it is damaged. You can find these at your local hardware store.
- Reassemble your faucet.
Step 4: Replace a Faulty Faucet
Sometimes, the problem isn’t the aerator or the cartridge, but a faulty faucet. If this is the case, you will need to replace the faucet.
To Replace the Faucet:
- Follow the instructions to disassemble your current faucet model. Videos can be found online for your type of faucet; make sure you know the model and brand.
- Find a new faucet at your local hardware store, and replace the faucet by following the instructions that came with the new faucet. If you need help, don’t hesitate to call a plumber!
Step 5: Call a Plumber to Check for a Blocked Supply Line or Leak
If replacing the faucet still doesn’t fix the problem (or other faucets in your home also have low water pressure), then it’s time to call a plumber. Debris, like mineral build-up, can block supply lines, making it harder for the water to get to your kitchen. There could also be a leak in the supply chain pipes. This means a portion of the water is getting lost before it even makes it to your home. Contact your plumber right away to check for leaks or broken pipes. Leaking or broken pipes will increase your water bill and can result in damage to your home.
Can’t Resolve the Issue on Your Own? No Problem!
The professionals at HEB Plumbing & Sprinkler can assess the situation, determine the problem, and repair it, all in a timely manner. Serving Bedford, TX, and surrounding cities, the Plumbing Lady and her team will get the job done! Don’t wait to get your faucet or pipes repaired. Call today!